|
|
|
|
Superchargers
4
Less C5 Corvette Procharger
HO Intercooled Supercharger Installation Continued
|
|
|
|
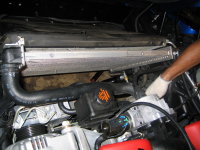
6. Installation of new fan shroud and single high flow fan: The compressor will be located on the passenger side of the car very close to the radiator, so close that there is not enough room for the original passenger side electric fan to remain in place. ATI supplies a new fan shroud and a high output larger electric fan to replace the stock fans. We unplugged all the wires from the original shroud and fans. The instructions say to remove the shroud assembly from the bottom, we didn't read that part... with the traction control unit loosened and pushed back, the assembly came out from the top side. We assembled the new single high output fan and shroud assembly. The new assembly just slides right into place where the original one was.
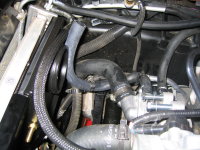
7. Relocation of the coolant recovery hose: The coolant recovery hose must be relocated to make room for the blower. ATI provides hose menders and a length of heater hose to relocate the hose. We cut the hose as instructed, then loosened the hose at the engine and rotated it downward. We cut the new piece of hose to the required length and spliced it to the original hose ends.
8. Installation of 160 degree thermostat (optional): ATI recommends that you run a 160 degree thermostat. The problem with the thermostat recommendation, is that ATI tells you this after you have installed the blower (if you are following the order that the manual is written) The thermostat cannot be reached with the blower installed. If you want to change the thermostat you had better do it now.
|
|
|
|
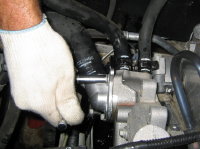
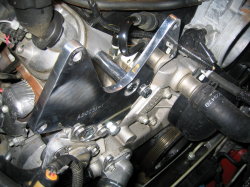
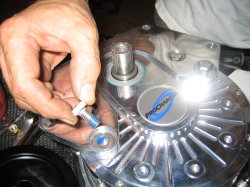
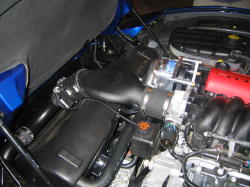
9. Mounting of the blower: The
mounting bracket comes pre-assembled... not exactly sure why, because it has to
be disassembled in order to mount it to the engine and the blower. We mounted
the back plate of the bracket to the engine with the bolts and spacers provided.
We removed the pulley from the supercharger in order to get to the bolt holes.
Using the supplied bolts and Lock Tite® we attached
the front plate of the bracket to the blower.
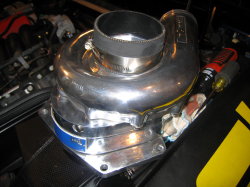
While the blower is still on the work bench is a great time to attach the rubber
hose that will connect the supercharger to the air cleaner housing... as space
is limited once you get the blower into position.
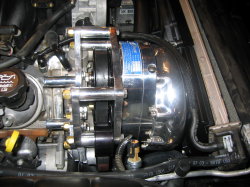
We headed to the car with the blower... inserting the rubber hose over the air
cleaner outlet 1st, we then installed the bolts and spacers that hold the front
and back plates of the blower bracket together.
Leave the bolt that holds the idler pulley out until you have installed the new
belt.
|
|
|
|
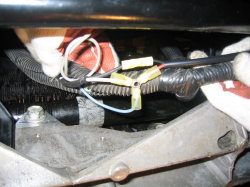
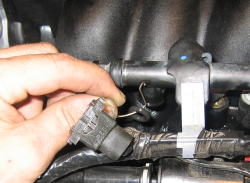
10. Wiring the new electric fan. We located the wires as directed in the instruction book and cut the factory ends off. Using the supplied connectors we made the connections as shown above.
|
|
|
|
11. We trimmed all of our tubing and made it tuck up under the car as close as possible, time consuming job.
12. We mounted the Bypass valve and tied it up securely so it would not fall down and drag the ground.
|
|
|
|
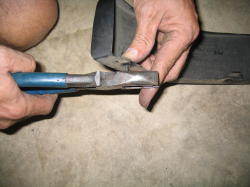
13. We found that
the point of the screws that hold the factory air dam in place were touching the
Bottom of the intercoolers, so
we trimmed the points off of them.
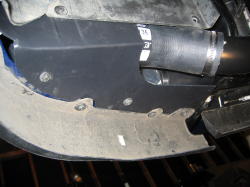
14. The kit
included new covers to go under the intercoolers and new brake vent ducts, these
pieces
bolted in perfectly.
|
|
|
|
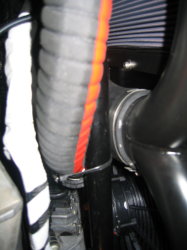
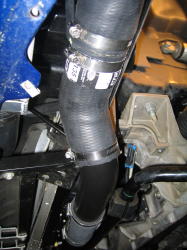
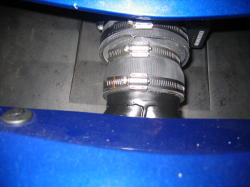
15.
Connecting the tubing from the driver side intercooler to the upper Y-pipe was
rather difficult, we
found that it was easier to
pre-construct the tubing and force it down beside the frame and the
radiator air duct.
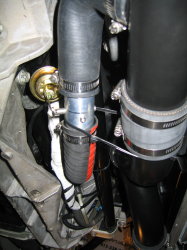
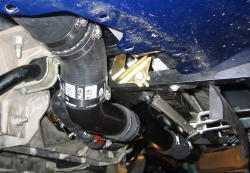
16. The
tubing to the throttle body had to be trimmed as short as possible in order to
allow the hood
to shut.
|
|
|
|
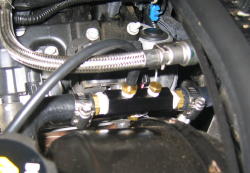
17. The system comes with a vacuum manifold that spliced into the brake booster line, this manifold is where you connect the line from the bypass valve and a optional boost gauge.
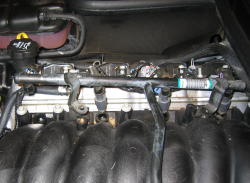
18. We
installed the new 38lb injectors that came in the kit. Be careful to make sure
that you don't
leave any of the original injector
O-rings stuck in the intake manifold or the fuel rails.
|
|
|
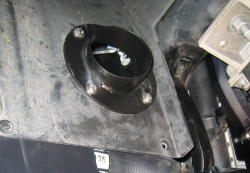
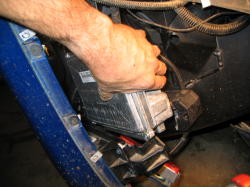
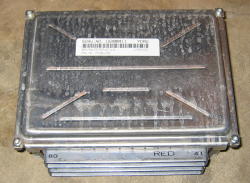
19. The stock
computer would not be happy with our new injectors and supercharger, it will
have
to be reprogrammed. When this system was purchased,
Procharger did not have a hand
held programmer available. We removed the computer from behind the access panel
on the passenger side behind the
front tire. We then shipped the computer to Ed Wright, owner of Fastchip
for reprogramming. Procharger now provides a hand held programmer for most years
of the C5.
"Click Here"
to continue to page 3
If you have high speed
internet service,
"Go Here"
to see the installation manual that Procharger provided with our system.
Superchargers 4
Less
Ph. 318-286-9169
If you find
it for less just give us a call...